Customer Email: Appointment Reminder
This automated appointment reminder email gets triggered as a result of a job displaying on the calendar.
So please visit the Email Automation screen.
Or you can visit the email automation screen by hovering your mouse over the "My Account" tab, scrolling down to "Email & Text Messages", and clicking "Email Automation":

So go ahead and tick the checkbox to the left of "Appointment Reminder" and the next thing that you need to do is select the time you want the email to be sent. 7am is the default time. Most users leave it set to 7am. If you want to set it to a different time, just click the dropdown arrow and select your desired time:
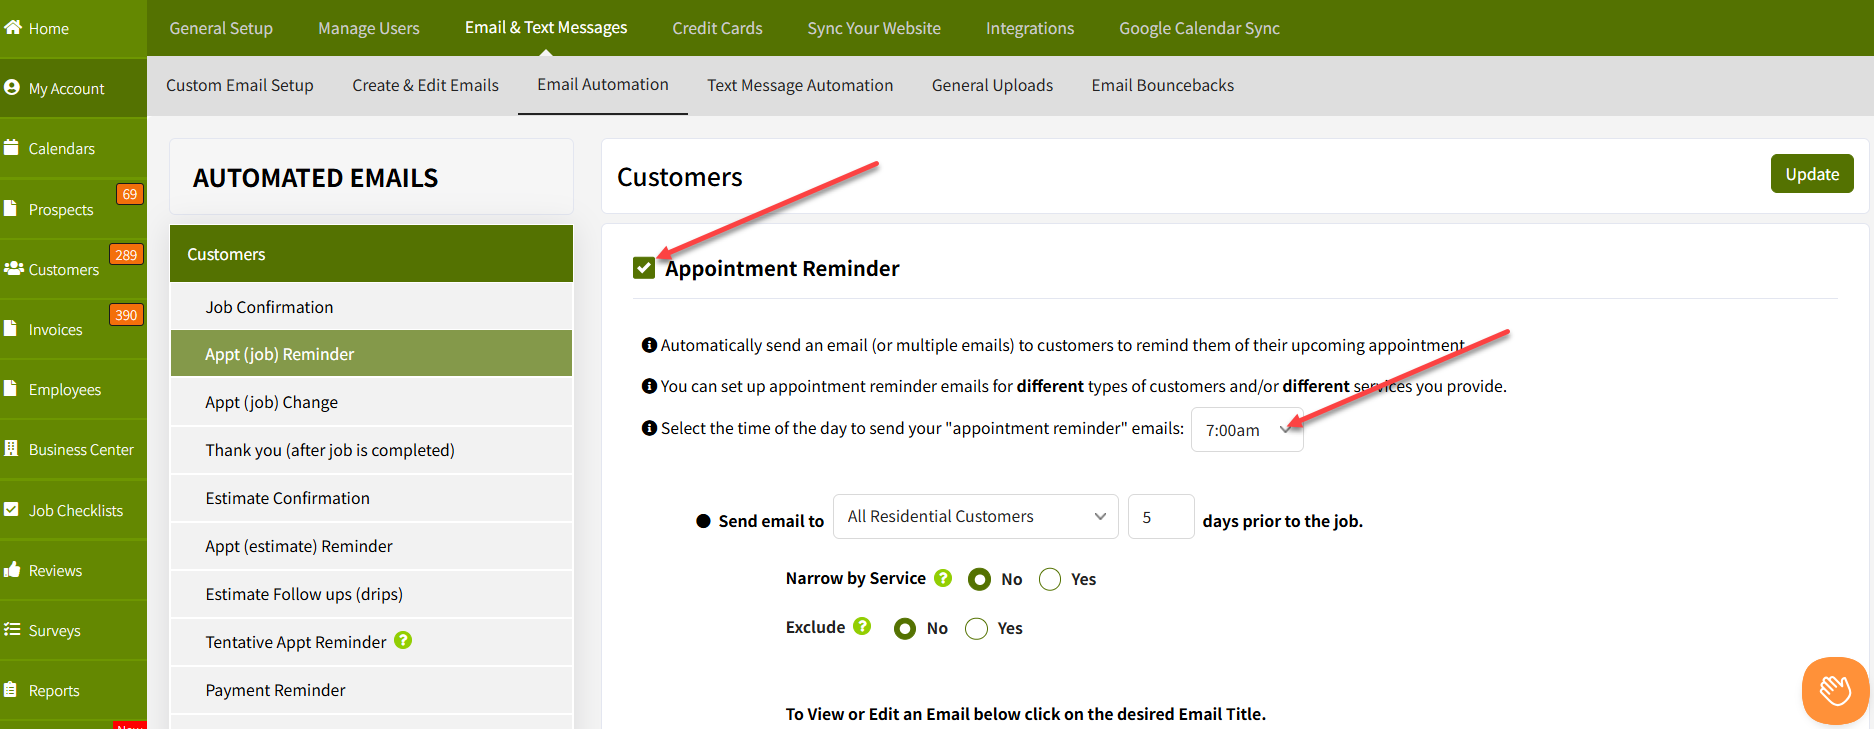
You can then select from the dropdown the type of customer you want to send the appointment reminder email to. For example, maybe you want to set up one appointment reminder email for residential customers and a different appt reminder email for commercial customers. For our example we'll select "All Residential Customers":
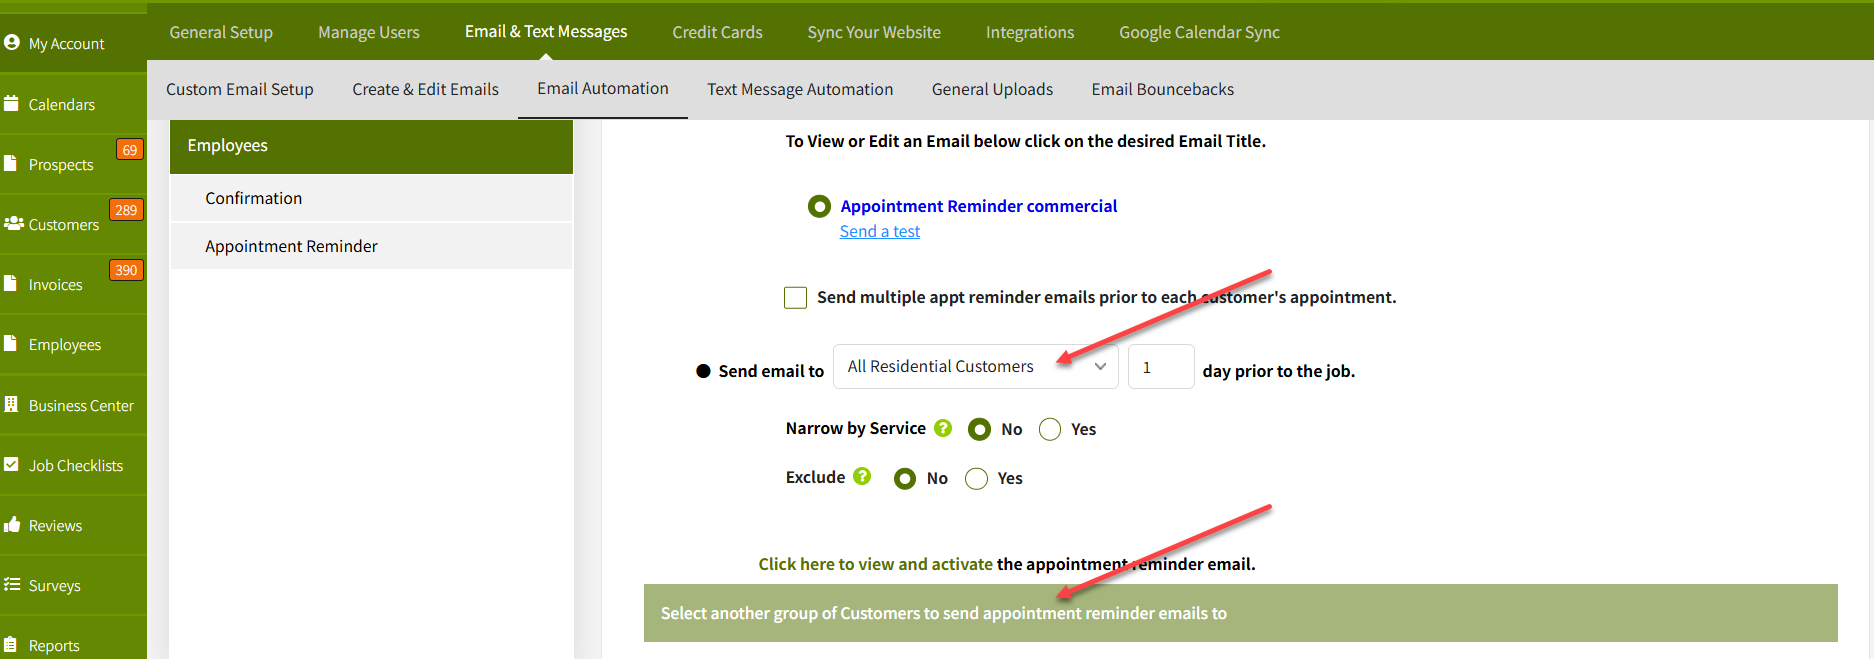
If you do want to add another type of customer to send an email to, you can click on the "Select another group of Customers to send appointment reminder emails to" as shown in the image above. You can see below that I've selected 3 different types of customers just to give you a visual:
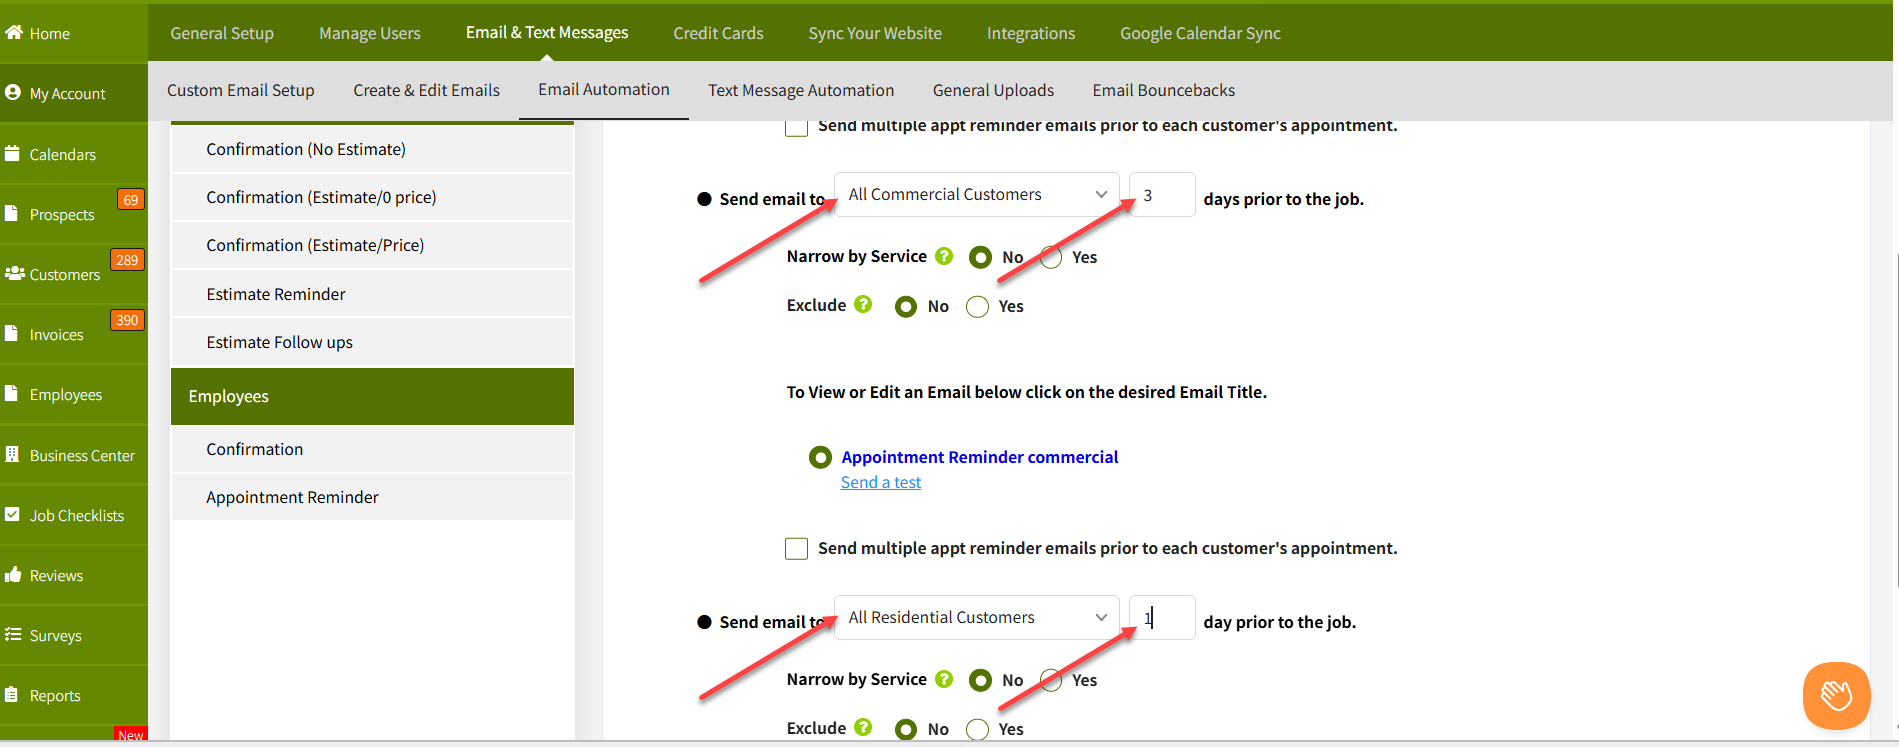
The next step is to type in the number of days in the box to the right of the dropdown that has the customer type in it. This indicates how many days prior to the appointment you want the email sent.
The next thing to do is to click the "Appointment Reminder Commercial" link that you see below to open up the sample email.

You can then use the sample appointment reminder email "as is" or you can edit it to better fit your needs:
Please note above the arrows pointing to the subject field, the message area, and the "Personalize" dropdowns. When you have your cursor in the editor the corresponding "Personalize" dropdown (the one right above the editor) becomes active and when you insert your mouse into the "Subject" field that "Personalize" dropdown (to the right of the subject field) becomes active.
You can then click the down arrow in whichever "Personalize" dropdown is active and personalize the email (or subject field if you want to personalize the subject field). For example, maybe you want to show an arrival time in the email or maybe you want to display an employee photo, or maybe you want to display the location (full or partial) in the email, etc. So you can personalize the email quite a bit.
Then all you do is click the "Update" button to activate the email. Make sure to click "Update" at bottom of the "Customers" area and you're all set. You now have automated appointment reminders to be sent x number of days prior to each and every customer job if the customer has an email address. Happy Trails!
Best regards,
